Preparing To Hunt A New Clearcut
By Dr. Ken Nordberg
[The following is the another of many older articles that will appear on my website. This is article was first published in Midwest Outdoors in June of 2011. Please share what you learn from these articles with your whitetail hunting friends.]
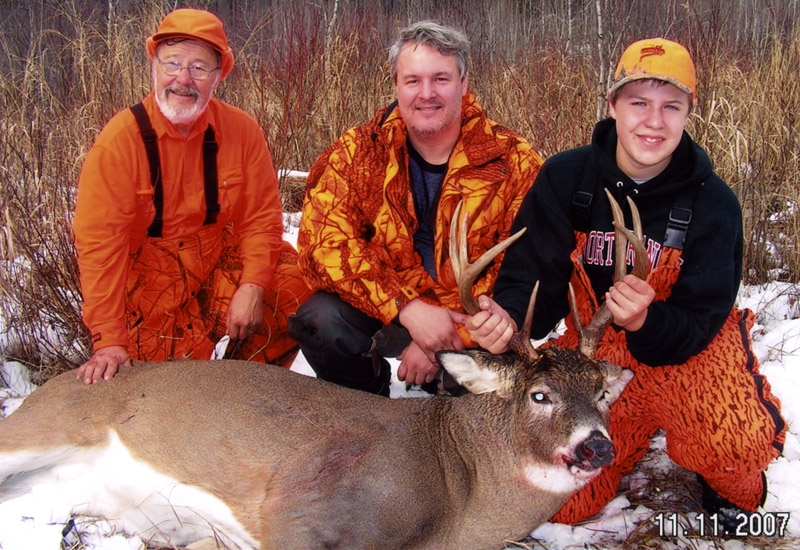
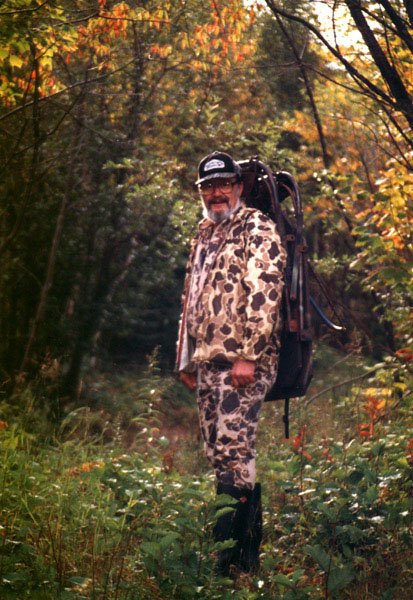
Author, son John and grandson Tyler with a big eight-pointer he shot [from a treestand] in the clearcut. (2007, 8-pointer)
New clearcuts have the reputation of being great places to hunt whitetails, mostly because they are typically covered with easy-to-spot deer tracks and whitetails are easily seen while feeding in them. Many hunters also believe clearcuts are easy to hunt. All you have to do — it is imagined — is sit on a log or in a tree on one side and wait for the deer to show up. Some more adventurous hunters will head across the clearcut to stand sites opposite the side where their vehicles are parked. Drawn onward by numerous deer tracks, a few will follow a logging trail right down the center of a clearcut to more distant stand sites where they turn around and watch the area where they just walked through.
A few will even climb piles of slashings (discarded branches) out in the middle where they have a grand view of the entire clearcut. And those who believe you aren't a serious deer hunter unless an ATV is in your pickup box or trailer will noisily speed down a clearcut logging trail to the far end of the clearcut before searching for a spot to sit. Sounds of ATVs heading across a clearcut a few miles from where I hunt each season make it obvious that those hunters — like many others who hunt clearcuts — are completely unmindful of wind direction. (And how whitetails always know where hunters on ATVs are!)
It's unbelievable the way so many hunt clearcuts as if they are hunting ducks, expecting whitetails to run the gauntlet at sunrise regardless of obvious human activities minutes or hours earlier. All it takes to ruin hunting for all hunters located around a clearcut is one hunter to make one of the above mistakes. Nevertheless, if you are fortunate to hunt a clearcut where none of the above mistakes have occurred, if you have taken the time to properly prepare to hunt the clearcut and, then, if you properly hunt it, yes, indeed you might head home convinced a new clearcut is a great place to hunt whitetails.
So how do you properly prepare to hunt a clearcut? It's impossible without scouting first. Scout two to three weeks before the opener, never the day before the opener.
There are several things to look for while scouting. If it doesn't matter to what kind of a deer you take, you don't need to spend time measuring deer tracks and droppings to identify classes of whitetails feeding in the clearcut. If you are determined to take a mature buck, however, look for fresh tracks 3–1/2 to four inches long and/or droppings 5/8th to an inch in length and remember where you found them.
To decide where you should sit (stand hunt), you also need to locate well-used deer trails around the edges of the clearcut, incoming trails and the trail usually ringing a clearcut. Typically the ringing trail will be 10–20 yards from the edge of the clearcut, coursing through surrounding forest cover. Deer will approach and enter the clearcut on the incoming trails. To avoid being prematurely identified by approaching deer on one or more of these trails, always sit downwind or crosswind from them.
During our Minnesota deer hunting seasons, winds mostly blow from the south or west. For this reason, plan to sit on the north or east side of the clearcut, even if it means you must make a wide detour through the adjoining woods to get there from downwind or crosswind. Approach no nearer than 100–200 yards upwind until downwind or crosswind. Never cross the clearcut to get to a stand site. Always approach an edge through dense cover in adjacent woods. You can usually find deer trails to use that will get you close to where you want to sit. For silent footing, clean your selected trails and mark them if you must (fluorescent tacks are best) so you can find your way in the darkness.
It's good to know where the trail that rings the clearcut is located. While approaching a clearcut, whitetails often travel at least part way around this trail to assess airborne odors coming from the clearcut and its vicinity, thus making certain no large predators or human hunters are waiting in ambush there before they expose themselves in the opening. If you sit between that trail and the edge of the clearcut, it is almost certain approaching deer will identify you without your knowledge. During the balance of the hunting season, those deer will either feed elsewhere or feed in the clearcut during night-time hours only.
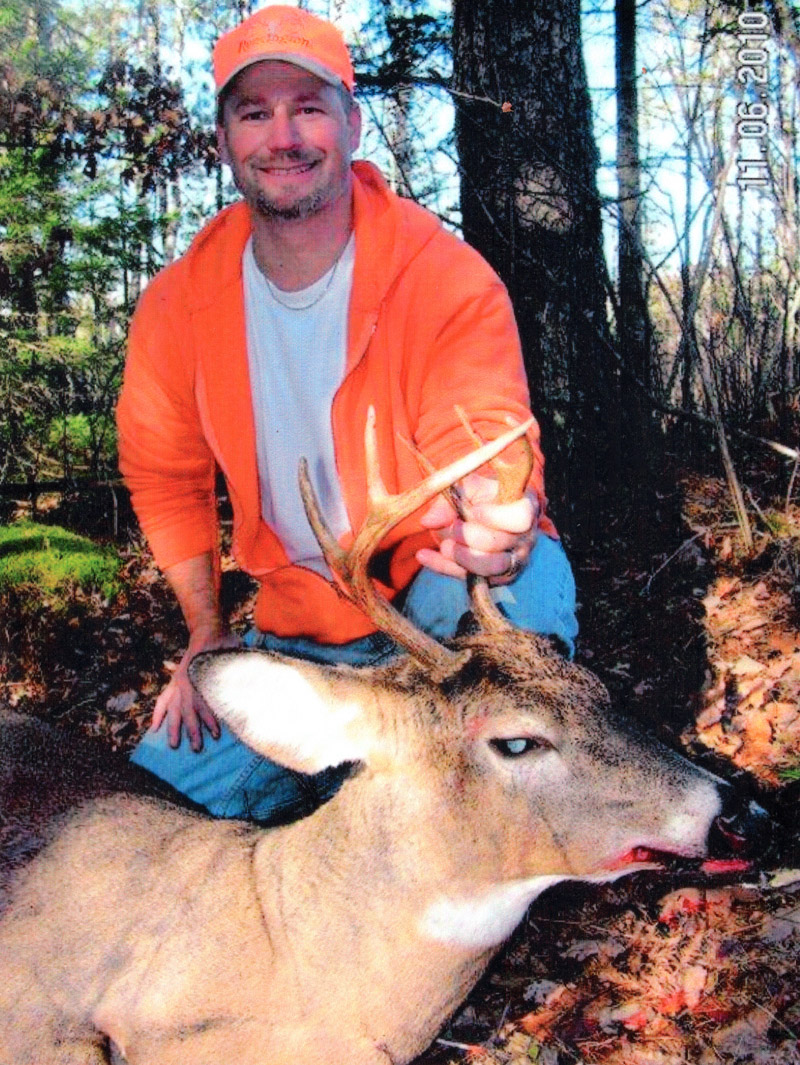
Doc's son Ken with a buck taken from a trail that ringed a clearcut. Note the clearcut in the distance behind Ken. (2010, 6-pointer)
Last season, to avoid being caught between the ringing trail and the edge of a clearcut by a certain buck, my son, Ken, selected a stand site 70 yards from the edge and ten yards to one side of an incoming trail. Fresh buck-sized tracks and droppings indicated the buck used both trails. [The incoming, and the ringing trails.] The first morning he hunted there, he dropped the unsuspecting buck traveling east on the ringing trail. In this case it was better to hunt the trails in the wooded periphery of the clearcut rather than at the edge where he would have had a wide view of the clearcut.
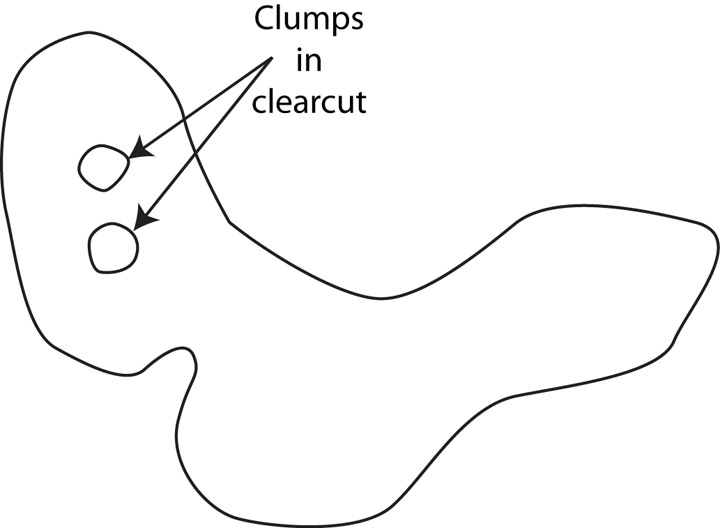
Clumps of uncut timber, like these, are likely spots to find beds.
Some whitetails, especially adult does, fawns and yearlings, commonly bed within new clearcuts, typically in clumps or points of uncut, mature timber. Search for deer beds, flattened ovals of grass 36–43 inches long, in such places and note their locations. Each time you hunt the clearcut, study those spots from afar with the aid of binoculars or your riflescope. You might soon find yourself looking at a whitetail staring back at you.
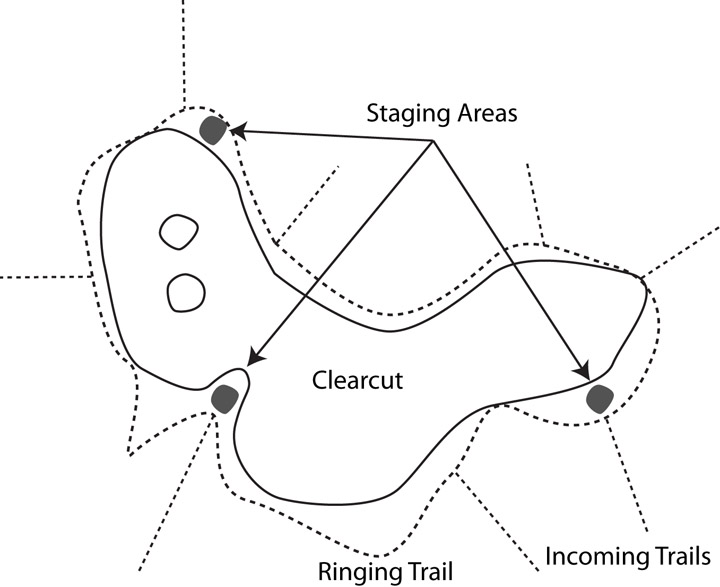
Typical clearcut details: staging areas, ringing trail, incoming trails.
Another feature to look for is a staging area, generally an area of dense forest cover adjoining the clearcut where whitetails have been congregating up to an hour before entering the clearcut. A staging area will be full of fresh and old deer tracks and droppings of all sizes. You might also find a few antler rubs, maybe a ground scrape or two and even a few beds. Older bucks like to remain hidden in a staging area until after other deer have entered the clearcut, watching them for awhile before deciding it's safe to enter the clearcut as well. In wolf country where whitetails commonly wait until dusk to begin feeding in the evening, a staging area can provide the opportunity to take a deer an hour earlier than almost anywhere else.
Some of the incoming trails will be obviously used more than others. Sit where you can keep an eye on one or more well-used trails with fresh tracks and/or droppings or a staging area from downwind or crosswind. Select stand sites with a solid natural background with some cover in front to hide your movements while preparing to fire your gun (or bow). Plan to use one stand site site no more than one day. Select enough stand sites so you can use a new stand site 100 yards or more away from any previously used stand site every day you plan to hunt.
The critical part of hunting a clearcut in the morning is getting to your stand site without spooking the deer feeding there. They'll begin feeding about 4 a.m. I always plan to get to my stand site, or close to it, at least 30 minutes before first light. The reason being, if I alert any deer as I approach, by the time it is light enough to legally shoot, those deer will no longer be curious about what made those soft footsteps they heard earlier. Because they will already be there, in the morning I make it a rule to approach a feeding area from downwind and then sit downwind. This rule, plus the current wind direction, dictates which stand I will use.
If my stand is very close to the edge of the clearcut, I generally stop short (50 yards or less) and sit down on my stool to wait for first light, listening and watching to make certain no deer are feeding very near my stand site before moving nearer. I now do this routinely because during past hunting seasons I have shot two bucks between where I had stopped short and my stand site during the first legal shooting minutes of the day.
[Editorial Note from Doc's son John: For the morning hunt, approaching the stand site in the dark undetected is, by far, the most critical process. For me — especially on opening morning — it is always one of the most exciting points in the hunt. We try to get to the head of our stand site approach trails early. As my father often mentions, our alarms in our tents go off at 4 a.m. for a reason. If we are late in leaving the tent, it creates a cascade of problems. For example, we tend to walk too fast and get too hot. Racing down the trail in the dark makes you hot & sweaty. Leaving on time allows you to set a pace where you do not get too hot. Especially if steam is billowing off your head in the cool air, consider stopping at the head of the approach trail for 5–10 minutes to cool off. The point I pick is usually about 100 yards from the stand site. Then I head down the stand site approach trail towards the “stop short” point. On our stand site approach trails — which are typically the last 50–100 yards — the single fluorescent tacks are placed low — about 18 inches above the ground. (Typically, we do not have snow this deep yet.) The low tack height reminds us to keep our lights pointed downwards. In my opinion, even pointing a light parallel to the ground is pointing it too high. Of course, we never point a flashlight toward the clearcut. We always assume there are deer there — and making this mistake would alarm them. When scouting, we mark the stop short points with a triangle configuration of fluorescent tacks. As we approach these points in the dark this visual clue of 3 tacks reminds us to turn off our red or green LED flashlights or cap lights. This happens about 10 yards before the stop short point. If needed, and if you use a small LED flashlight, you can wrap your hand around the bulb so that only a very small amount of light leaks out between your fingers. Pointing this barely visible light directly at your feet only illuminates about one square foot of ground. However, this is enough to sidestep sticks, twigs and rocks. Step slowly and lightly. In the dark, there is nothing else to look at. With almost no light, your pupils are dilating. At the stop short point, put your light away. Use all of your senses, and wait 5–15 minutes. Because the final approach to the stand site is typically made in complete darkness, a clean trail between the stop short point and the stand site is especially important. Of course, if you have done everything correctly, there is very high probability that whitetails are feeding very close by. Patience is needed. This is the most deflating point to goof up and hear snorting deer!]
When I head to a clearcut in the afternoon, I generally approach from crosswind and sit crosswind. The reason is, unless using a staging area, deer will almost always approach from downwind after I have arrived there. If I were sitting downwind, they'd smell me well before they were near and then feed elsewhere. If they approach from downwind on my side of the clearcut, they'll still smell me (whether on the ground or up in a tree), but if they approach toward the opposite side or from the center of the downwind side of the clearcut, they won't smell me, considerably improving my odds of seeing deer late in the day.
Because I approach clearcuts in darkness in the morning, I must use a flashlight to find my way. During the past four seasons, I've used a green LED cap light. Whatever light I use, I make it a rule to stop and turn it off before it can readily spotted by deer feeding in the clearcut. Within a couple of minutes, my eyes will adjust enough to enable me to proceed without difficulty to my stand site or the spot where I plan to stop short.
Clearcut shooting is often long-range shooting. When hunting a clearcut, I have often been thankful I use a very accurate bolt-action rifle chambered for flat-shooting 7-mm magnums and topped with a variable-powered scope that can be cranked up to seven-power. Before hunting a clearcut, do everything you can to become proficient at firing your weapon at targets 100–400 yards away. At such ranges you must understand the trajectory of your bullets. For example, while using 150-grain bullets with my rifle sighted in to hit one inch high at 100 yards, I must hold 17 inches high at 400 yards.
Remember too, experienced adult whitetails (and older black bears) are well aware of what is happening when they hear an ATV or other motorized vehicle approach or cross a clearcut and then stop. I would never drive one within a half mile of any clearcut I planned to hunt.
Finally, if it appears one or more other hunters are already hunting the clearcut (or any other area) you had planned to hunt, be a good sport and hunt somewhere else. In deer hunting the Golden Rule should always apply: treat other deer hunters as you wish they would treat you.
Good Luck Hunting,
Doc